Importing - source and destination
In this lesson you will set the source and destinations for your files, plus conversion from camrea manufacturer's Raw files to DNG Raw files.
Import Photos . . .
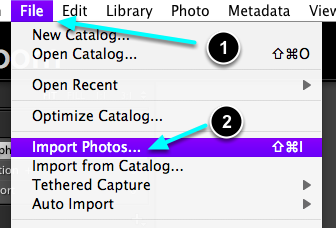
Go File > Import Photos ...
Or, press the Import ,,,, button (bottom left).
Source
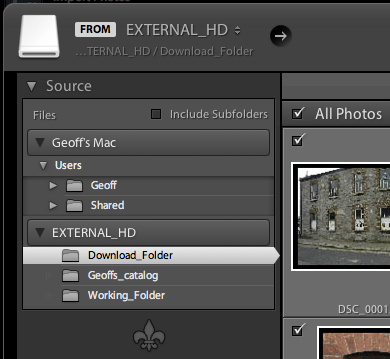
Select the source folder, Download_Folder, on your external HD.
Destination
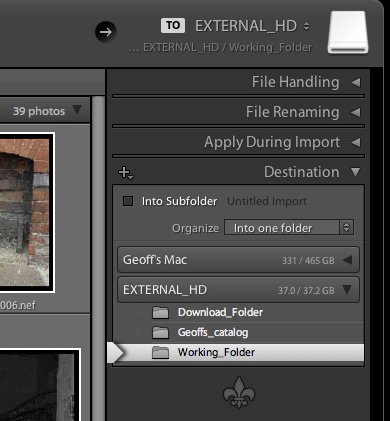
Select the destination folder, Working_Folder, on your external HD.
Convert RAW files to DNG (Digital Negative Raw files)
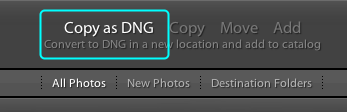
Select, Copy as DNG.
Selecting files to Import
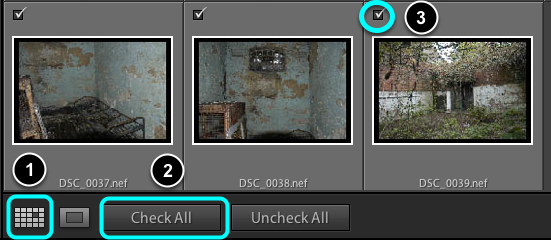
- Ensure that you are in Grid View.
- Select Check All to select all images to be imported.
- Individual images can be selected, or de-selected, by usinf the tick boxes.
File Handling

- Select: Render Previews > Standard.
- Leave unselected the tick box: Build Smart Previews
- Tick box: Don't Import Suspected Duplicates.
- Leave unselected the tick box: Make a Second Copy TO:
(If you want to make a second copy of your imported files at the same time to a defferant extenal HD then select his option.)
File Naming
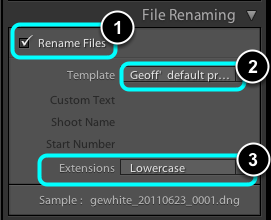
- Make sure that the tick box is selected: Rename Files.
- Select your personal filenaming template which you made previously.
- Select: Extensions > Lowercase. This will ensure that all filenames are uniformally lowercase (i.e. no CAPITAL letters).
Note example of filename format displayed at bottom of panel.
Apply During Import

- This allows you to choose how the files are developed on ipmort after being converted to DNG. More prosessing means a longer import time. Choose None, this time
- This will apply your IPTC Creator and Copryright presets to your files as they are imported automatically. Saves time and grief later.
Keywords
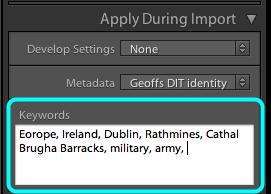
In the keywords box add descriptive words which could be applied to the overall set of images being imported.
Start with location words, such as the continent, country, city, place etc.
Continue with words which might describe to subject matter: activity, context, objects etc.
Destination Check

Check that the Destination Folder is the intended folder. This check will avoid endless extra work and lost files at a later stage.
Go for it
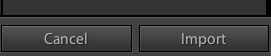
Slect the Import button