Exporting a Catalog
In this lesson you will learn how to export a catalogue plus copies of its image files.
Very important: if you only need to export the catalog with preview images, but without the original image files, please note item 3 in the Export Dialogue step below.
Export folder
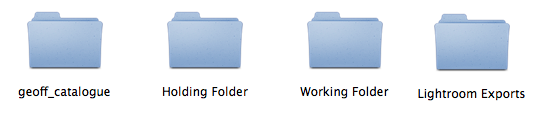
Ensure that you have an Lightroom Export folder beside your Holding and Working Folders. If you do not have one, see the earlier tutorial titled: Create an Export Folder
Select images to export

Select the images which are to be included in the exported catalog. If necessary, place them in a separate Collection for convenience.
File > Export as Catalog

Go File > Export as Catalog . . .
Export dialogue
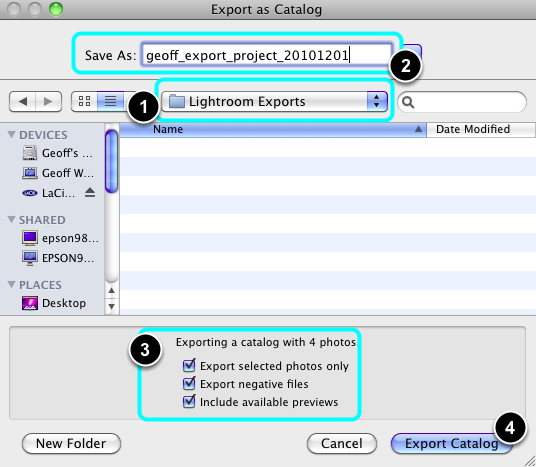
- Navigate to your Lightroom Export folder.
- Name your new catalog using your name, project brief and date of submission.
- Ensure that all three boxes are selected if you want to export copies of your image files with your catalog. Otherwise, do not select the box Export negative files, thus only the catalog and image previews will be exported.
- Select: Export Catalog.
The exported catalog
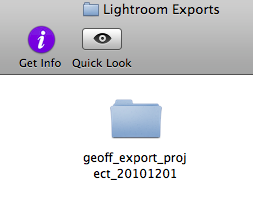
Lightroom will now make a new catalog containing only the selected images plus copies of the image files.
These will be placed in a new folder within the Lightroom Exports folder.
The exported catalog and Working folder
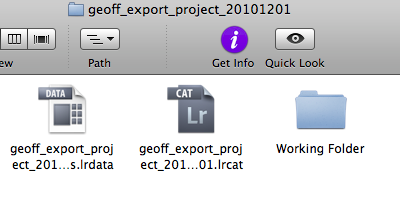
Use the Finder to check the catalog is correctly saved in the right location. You should see two Lightroom catalog files plus a new copy of your Working Folder.
Open the new catalog in Lightroom to ensure that it is as you intended it. You can now Quit Lightroom if you are satisfied with the new catalog.
Check the images
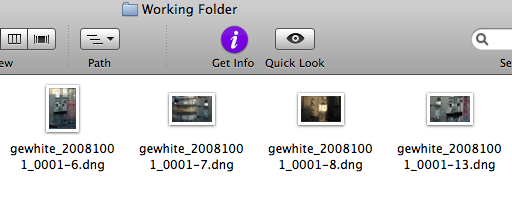
Open the new Working Folder in the Finder and check that the images are present and correct. Use Bridge to check the images. This step is not relevant if you have not exported your image files with your catalog.
Burn Folder
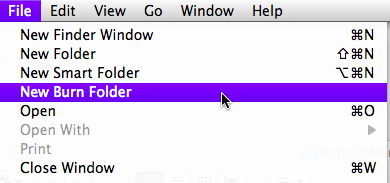
Open a New Burn Folder in the Local Share, or on your Desktop if working on your own machine.
Select files

- Drag the catalog files and the Working Folder into the Burn Folder.
- Check the size of the export. Insert a new CD or DVD into the Mac depending on the total size of the export.
- Select Burn.
Burn dialogue
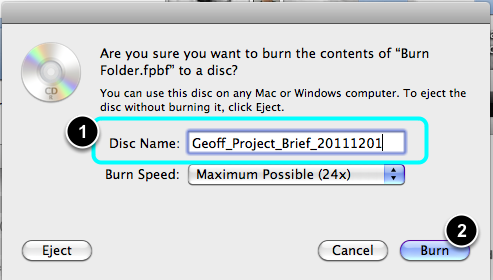
- Name the new disc.
- Select Burn.
Burn

The software should now burn the CD/DVD and Verify it.
Check the disc
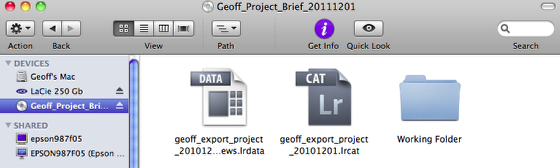
Using the Finder check the new disc to ensure that both the catalog files and image files are present.
Troubleshooting
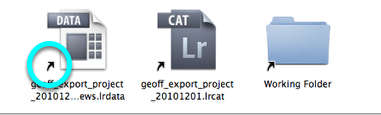
If your files on the disc show small arrows as above, then your disc did not burn the files only a series of Short Cut icons which contain no data. You will need to redo the burning process.
Burning discs on the TB network is best done with all material copied into the Local Share as working from your external drive and the network is generally too slow.
If you are working on your laptop or PC then place the files into a temporary folder on your Desktop.
NB. You will not be able to open your Catalog directly from your CD/DVD, and you will get an error message. This is because Lightroom expects to be able to write to the drive where the Catalog is but can't since it is now on a locked CD/DVD. This is normal so do not worry.