Dodge and Burn safely
In this lesson you will learn how to darken and lighten parts of an image using a non--destructive methodology.
New Layer
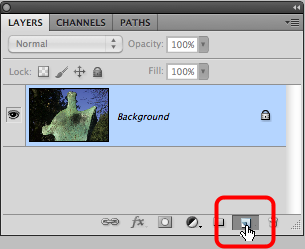
Hold down the OPT (Alt) key and select the New Layer icon on the Layers palette.
New Layer settings

- Enter a descriptive name for the new layer.
- Select Mode: Overlay.
- Tick the box marked: Fill with Overlay - neutral color (50% gray)
- Select: OK.
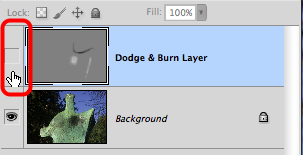
Dodge & Burn Layer
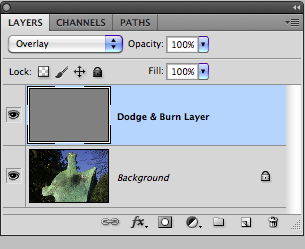
Ensure that the new layer is selected. This is indicated by blue background on the layer.
Brush tool

Select the Brush tool. Shortcut: B.
Brush Palette
Select the Brush palette.
Brush size and edge

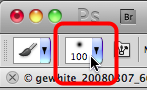
- Choose a Brush size. Size will depend on the target area.
- Choose a Brush edge Start at 0% - a very soft edge to the brush.
- Alternatively, choose a brush preset.

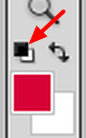
Select the default colour palette icon. Shortcut: D.
Burn
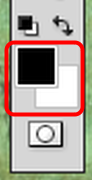
To burn a portion of the image, ensure that Black is the foreground colour.
Burn in the image
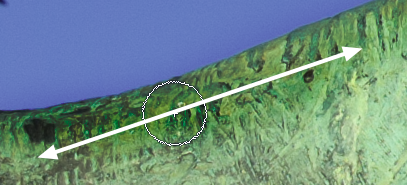
Move the Brush along the area you wish to darken. Repeat as often as is needed to darken the image.
Dodge
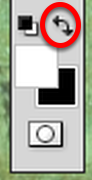
To dodge a portion of the image, ensure that White is the foreground colour.
Use the Exchange icon to swop foreground colour for the background colour. Shortcut: X.
Dodge the image
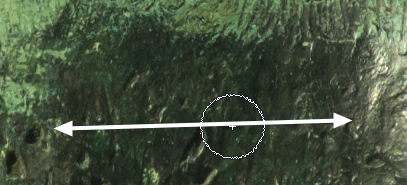
Move the Brush along the area you wish to lighten. Repeat as often as is needed to lighten the image.
View the changes
Toggle the layer on and off to view the changes.